
Welcome to my guide on how to make a bow for your Christmas tree! With Christmas tree Black Friday sale just around the corner, it’s the perfect time to start planning your holiday decorations. A bow is a simple but elegant addition to any tree, and with a few easy steps, you can create a beautiful and unique piece for your home.
Supplies Needed to Make a Christmas Tree Bow Topper
Supplies Needed to Make a Christmas Tree Bow Topper:
– 2.5 inch Wired Ribbon (25 Yards)
– Floral Wire or Pipe Cleaners
– Scissors
– Wire Cutters
– Bowdabra Bow Maker (check out a tutorial on how to make a wreath bow using a Bowdabra bow maker!)
Steps
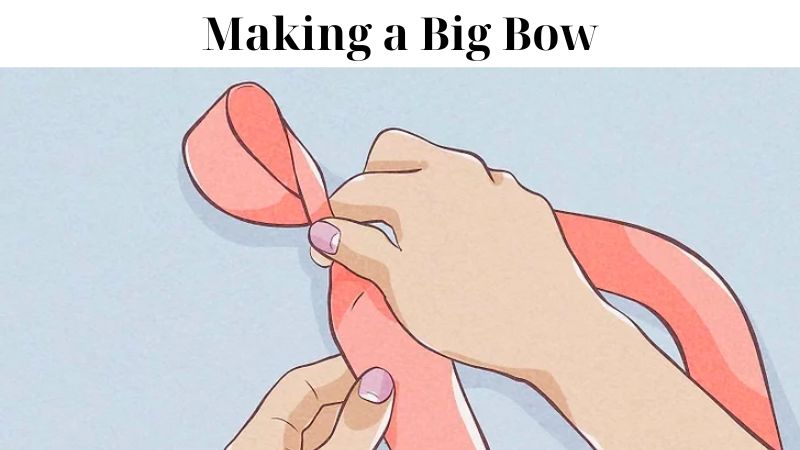
Making a Big Bow
Make a loop
Pulling about 6 inches (15 cm) of wired ribbon from the spool. Pinch it tightly between your thumb and forefinger of your left hand.
Now, using your right hand, pull more ribbon from the spool and form a loop. Bring your hands together, and scrunch the bottom of the loop with the pinched ribbon between your left hand’s fingers. To secure the loop, twist the pinched ribbon in your left hand.
– Remember, for larger trees, the loops should be 10 to 12 inches (25 to 30 cm) long, so you’ll need about 20 inches (51 cm) of ribbon for each loop.
– Also, make sure to use wired ribbon, as it will hold its shape better than other types of ribbon.
– Twist the ribbon so that the decorated side is on the outside of your next loop.
Make a figure eight
Take more ribbon from the spool using your right hand. Create a loop that goes in the opposite direction from the first loop. Join the bottom of the second loop with the pinched ribbon in your left hand and twist it clockwise to secure it.
– The first two loops should resemble the shape of the number eight. Ensure that the second loop is the same size as the first one.
– Hold the loops against the tree to determine if the bow will fit correctly.

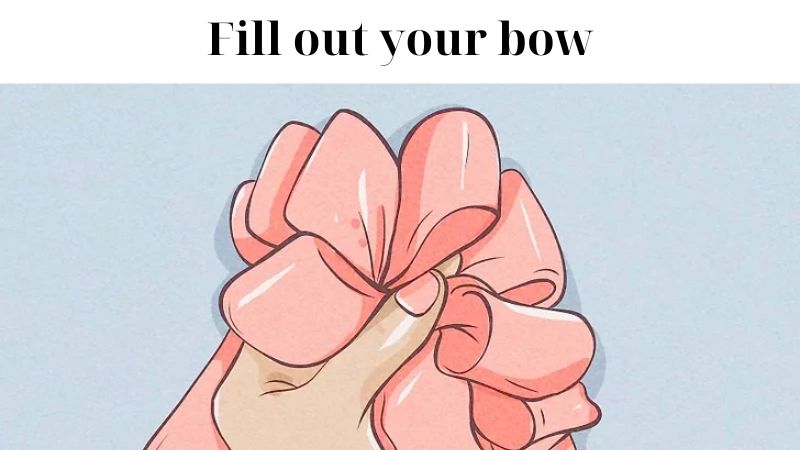
Fill out your bow
Keep making alternating loops until you feel your bow is complete. You can make ten loops for a fancy bow, but the number can be adjusted as per your preference.
Remember to tightly pinch and twist the bottom of each loop. Scrunched up the bottom of all the loops between the thumb and forefinger of your left hand.
The decorated side of the ribbon should be on the outside of each loop.
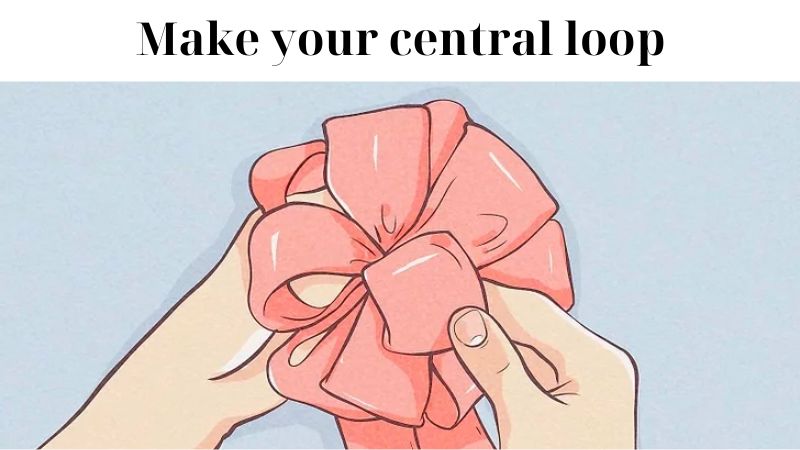
Make your central loop
After creating all the other loops, take the last loop you made and hold the bottom part of it in your left hand. Twist it just like you did with the rest of the loops
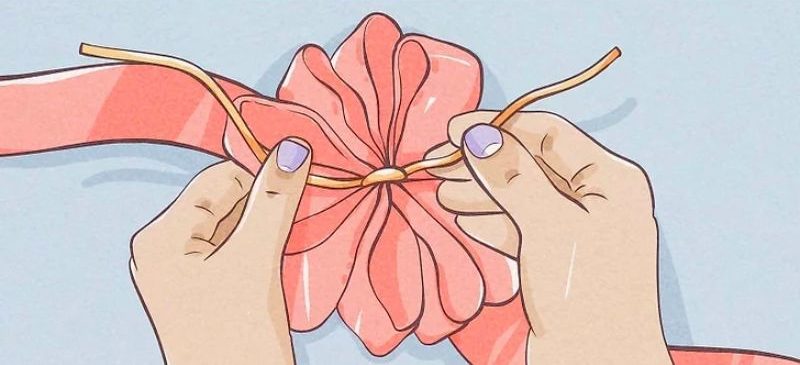
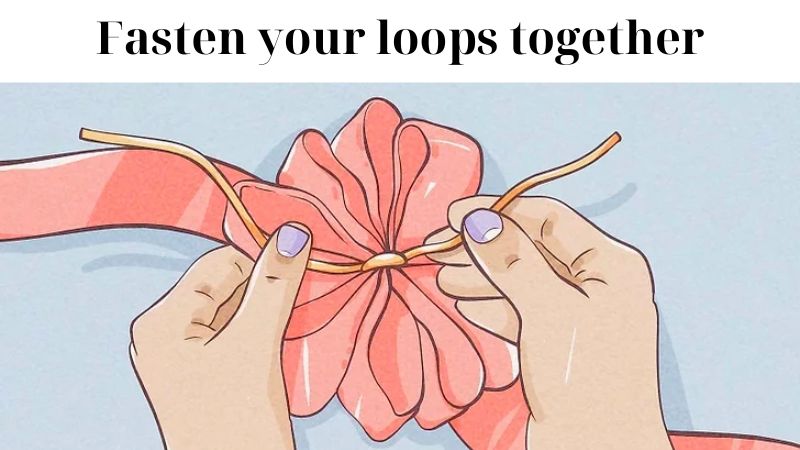
Fasten your loops together
Fastening your loops together can be done by molding a piece of floral stem wire into a “u” shape and inserting the loose ends into the central loop of your bow. Then, bend the ends around the bottom part of your bow and pull them through the “u” part of the wire. Once done, pull the loose ends in opposite directions to create a tight knot. To ensure a secure fastening, twist the ends of the wire multiple times. For attaching your bow to the top of your Christmas tree, repeat the same process with another piece of floral wire.
– Choose the best color of floral stem wire that matches your bow, such as green, silver, or white.
– Additionally, it’s recommended to use twenty-six gauge floral stem wire for fastening bows as it offers optimal thickness and moldability.
Making the Streamers
Cut some ribbon
Alright, cut some ribbon by measuring at least four lengths from your spool. These will become your streamers. To create a neat finish, fold the sides of one streamer in half from the inside and make a diagonal cut at the bottom, starting from the outside to the inside. Unfold the streamer and repeat this process for all the streamers.
Fasten your streamers to your tree
Secure your streamers to the Christmas tree by wrapping floral stem wire around the top of each streamer. Make sure it’s tight by pulling the excess wire in opposite directions. Attach the streamers to the tree branches, hiding the tops under the bow. Repeat this process for all the streamers, ensuring they appear connected to the bow.

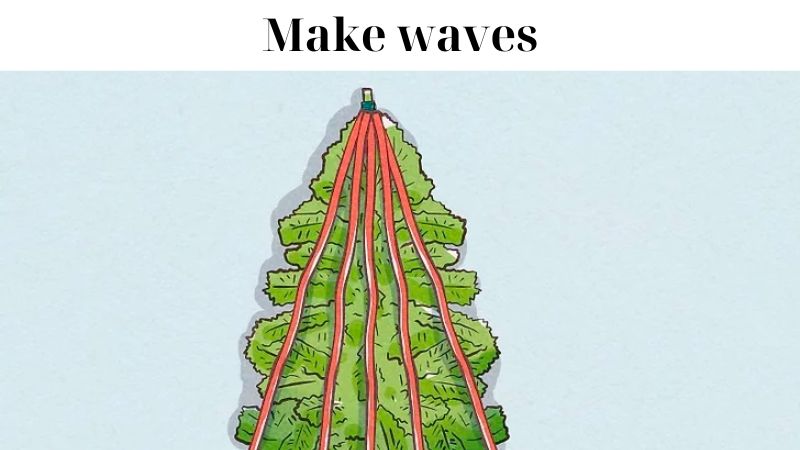
Make waves
To make waves with your streamers, place a paper towel roll under the ribbon and smooth the remaining tail underneath.
Use smooth movements and avoid pressing or pinching the streamers.
Excessive manipulation can create unwanted ripples that won’t highlight your waves. Keep in mind not to go overboard with the waves, as too many can make the streamers look rigid.
Secure the rest of your streamers in place
Secure the rest of your streamers in place by strategically folding branches around them, ensuring that each streamer is held firmly in position along the length of your Christmas tree. Avoid folding too many branches around the streamers, as it may make them appear cluttered.

Tips
– Use wired ribbon for a bow that holds its shape.
– Add bells, dried fruits, glitter, or layer different color bows to enhance the look.
– Use streamers that are the right size for your tree, around a yard and a half should be good for a normal size tree.
Warning
Remember to tightly pinch the center of your bow while making it, or it may unravel.
Additionally, keep in mind that your streamers will shrink when you create waves. Consider starting with slightly longer streamers to compensate for the decrease in length.

Hi, my name is Phillip K. Weddle and I am the CEO of christmastreeblackfriday. I was born on May 18, 1966, and I currently reside at 2705 Bassel Street in Harahan, LA 70123. Being a Taurus, I am someone who is grounded, dependable, and enjoys the finer things in life. Before becoming the CEO, I worked as a Mold and Model maker at Robert Hall. However, my true passion lies in gardening, decoration, and DIY stuff, which is why I started this website. I wanted to bring together my love for the holidays and my enthusiasm for decoration and offer the best deals on Christmas trees at Black Friday.