

Tools and materials:
– Clear nail polish
– Red nail polish
– Stripping tape
– Tweezers
– Star beads
– Gold nail polish
– Nail polish remover

How to Paint
First of all it is important to make sure your nails are clean and ready to be painted
Before we begin, let’s make sure your nails are clean and ready to be painted. Start by removing any existing nail polish with a nail polish remover. Once done, wash your hands to ensure your nails are completely clean.

Read More: black friday christmas tree sale
Next, tidy up your nails and shape them using a nail file. If you want to make your nails appear longer, gently push back your cuticles. To make this easier, soak your hand in warm water for a few minutes to soften the skin.
Now that you’re ready, apply a base coat to protect your nails from staining and to make the nail polish application smoother. I recommend using the Vitamin Base Coat for this step.
Apply two coats of nude nail polish on each nail. Let it dry.
To create festive Christmas trees on your nails, start by applying two coats of nude nail polish on each nail as a base. This will provide a clean canvas for your holiday nail art. Allow each coat to dry completely before moving on to the next step. This base will help your Christmas tree design stand out beautifully on your nails, ensuring a perfect and long-lasting holiday manicure.
Clean up
Cleaning up any nail polish residue around the edges of the nail, you can use a Q-tip or a fine-tipped brush with nail polish remover. It’s a handy technique you can employ in your everyday life.

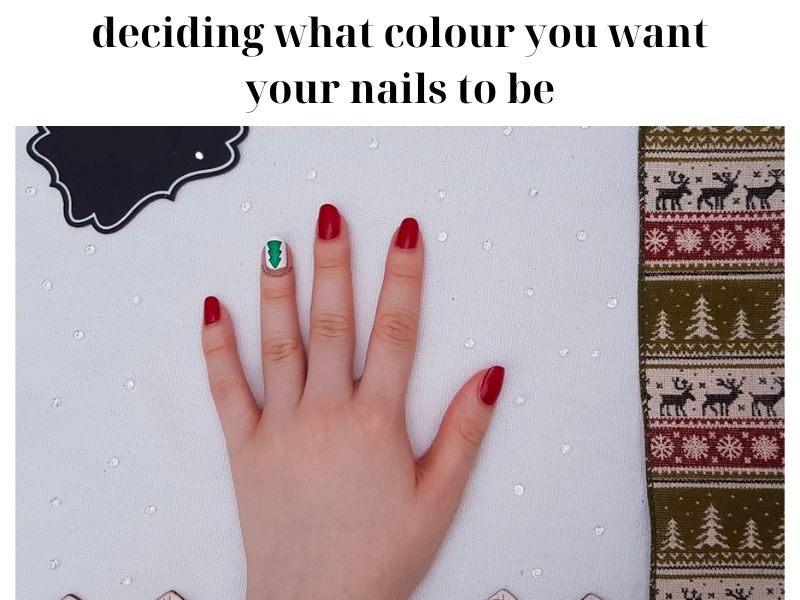
Deciding what colour you want your nails to be
We can move on to the fun part – choosing your nail color! For this style, we decided to make the ring finger the main attraction. We painted that nail with French White nail polish and the rest with Mulled Wine nail polish.
Time to start creating the Christmas tree
it’s time to get creative with the Christmas tree! For this, I used a long, pointed brush with nail polish in the color Loosey Goosey Dancin. Started at the bottom of the tree and worked my way up.
Shape the Christmas tree
Cut the stripping tape and put it on the nail in a criss-cross shape, as you can see above.
Paint the tree
I paint the tree by using a fine-tipped brush to apply gold nail polish to each insignificant pocket of space between the stripping tape.

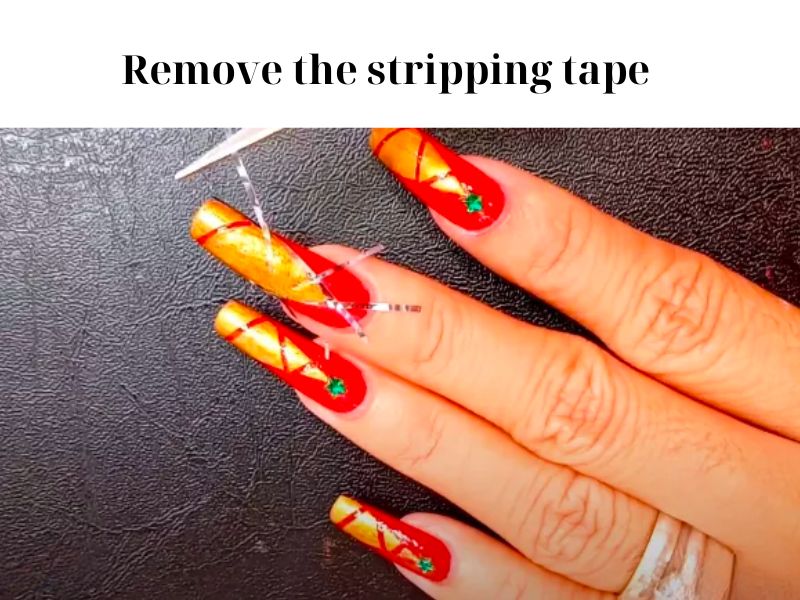
Remove the stripping tape
You can remove the stripping tape from your nail carefully using tweezers or scissors. It’s ideal to do this before the nail polish completely dries, so the tape doesn’t stick to the nail.
Now it’s time to add a little bit of sparkle to the tree
Now let’s add some sparkle to the tree! First, we applied a bit of nail polish in the color Loosey Goosey Dancin to provide a surface for the glitter to stick to. Then, we gently brushed on the green glitter using a small pointed drawing brush.
Some colour decorations onto the Christmas tree
For adding the final touch to our Christmas tree, we used a dotting tool to paint on colorful decorations. We opted for a mix of yellow, orange, blue, and pink to make the tree vibrant. As you can see, the decorations made our Christmas tree look fabulous!
Apply the top coat
After finishing, simply apply a clear top coat and allow it to dry.

Hi, my name is Phillip K. Weddle and I am the CEO of christmastreeblackfriday. I was born on May 18, 1966, and I currently reside at 2705 Bassel Street in Harahan, LA 70123. Being a Taurus, I am someone who is grounded, dependable, and enjoys the finer things in life. Before becoming the CEO, I worked as a Mold and Model maker at Robert Hall. However, my true passion lies in gardening, decoration, and DIY stuff, which is why I started this website. I wanted to bring together my love for the holidays and my enthusiasm for decoration and offer the best deals on Christmas trees at Black Friday.